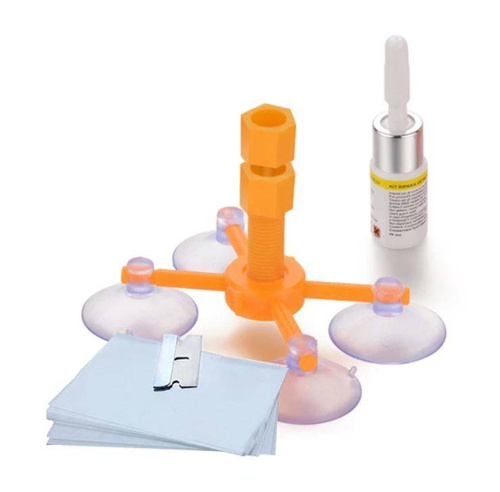
D3921 | repair kit for cracks and scratches in car windows | adhesive for glass, headlights
- - Utilisation sûre, même pour les personnes inexpérimentées - Ensemble réutilisable - Utilisation simple et rapide
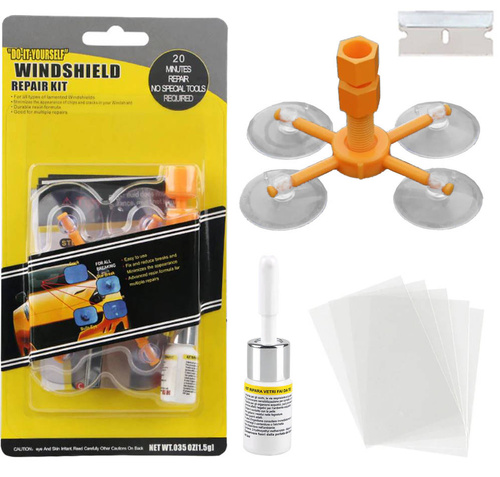
Repair kit for car windshield
The kit allows you to repair the windshield yourself - remove chips from impacts and scratches. At the same time it is safe to use, even for an inexperienced person.
Reusability of the kit.
Quick and easy to use.
Eliminates stress at the site of cracks.
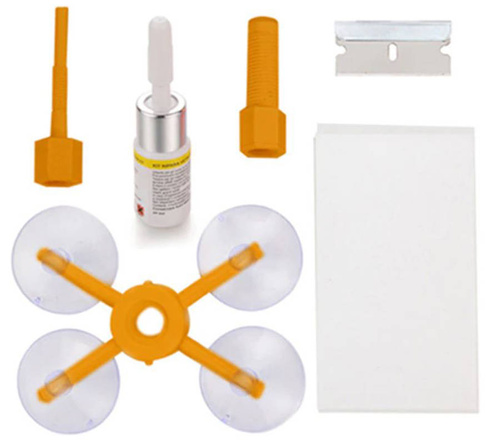
Included:
Vacuum chamber/glue dispenser
Ring with suction cups
Repair adhesive
Alignment films
Razor blade with safety handle
Original packaging
Windshield Repair Kit is an easy-to-use kit for repairing windshields and glass body parts, such as headlights.
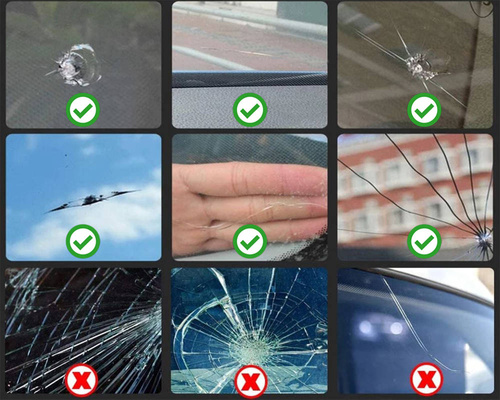
It is designed to eliminate chips and cracks caused by impact with stones, gravel, etc. It is used to repair various types and types of chips.
Colorless, it does not leave traces.
After application, the product takes on a transparent form, so that the repair site of cracks and cracks caused by cracks become almost invisible. Most importantly, the repair stops further cracking of glass at the repair site.
The set is suitable for multiple use.
Directions for use:
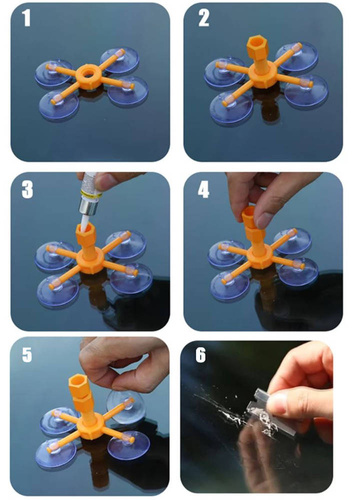
A. Spot/circular crack - points 1-6.
1. Place the applicator with the suction cups to the glass. The center hole should be above the crack.
2. Screw the sleeve (without the screw) into the center hole of the applicator in such a way that the end of the sleeve meets the center of the crack more firmly.
3. Place 4-6 drops of glue in the applicator.
4. Screw the plunger in and out several times so that the glue can get into as many nooks and crannies as possible. Leave the plunger screwed in for several minutes until the glue dries.
5. Peel off the applicator.
6. Scrape off excess glue with the supplied razor blade.
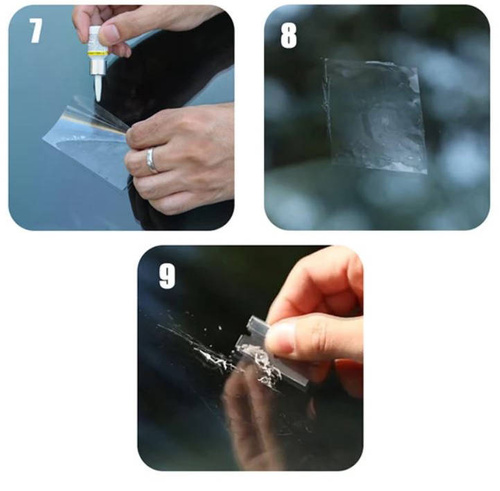
B. Longitudinal crack - points 7-9
7. Place glue along the crack, without using the applicator.
8. apply a protective film along the entire length of the crack. Leave it for a few minutes until the glue dries
9.After this time, peel off the film. With the attached razor blade, pull off the excess glue.
Une garantie qui apporte du confort
En achetant chez nous, vous bénéficiez non seulement d’un produit, mais aussi de 2 ans de service. Nous garantissons la qualité – vous profitez sans souci.
Plus d'informations sur les réclamations et retours de produits achetés.


